There are three ways to install Git on Windows:
- Using the Git installer. The GUI installer wizard is available on the official Git website and allows you to configure the Git installation step-by-step.
- Using Winget. A Linux-style CLI package manager for Windows that simplifies app installations but offers fewer configuration options as it assumes all default options.
- Using chocolatey
Choose your preferred installation method based on how much control you want over the installation process and your preference for using the GUI or CLI.
Install Git on Windows via GUI
The GUI method involves downloading the Git installer wizard from the official website and configuring the installation in a traditional Windows step-by-step manner. This approach is useful if you want full control of the installation process and do not like using the CLI.
Note: During the installation, Git prompts you to select a text editor. If you don’t have one, we strongly advise you to install it prior to installing Git. Our roundup of the best text editors for coding may help you decide.
Follow the steps below:
- Navigate to the official Git downloads page and click the download link for the latest Git version for Windows:
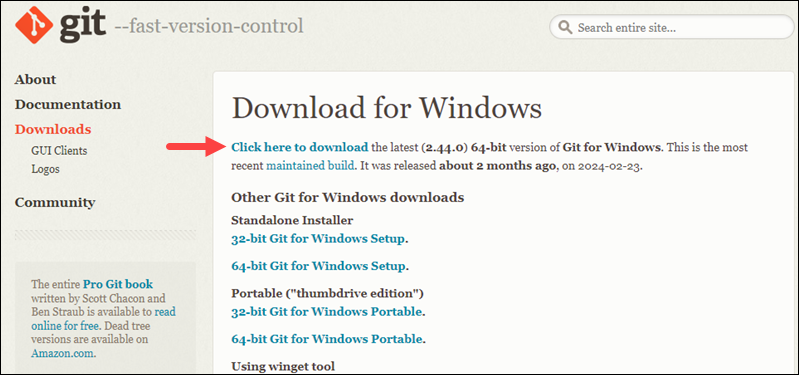
The link contains the latest 64-bit Git version for Windows. Alternatively, if you use a 32-bit system, download the 32-bit Git installer.
-
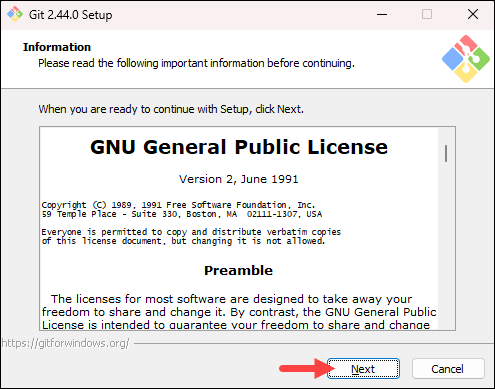
Double-click the downloaded file to extract and launch the installer.
-
Review the GNU General Public License, and when you are ready to install, click Next.
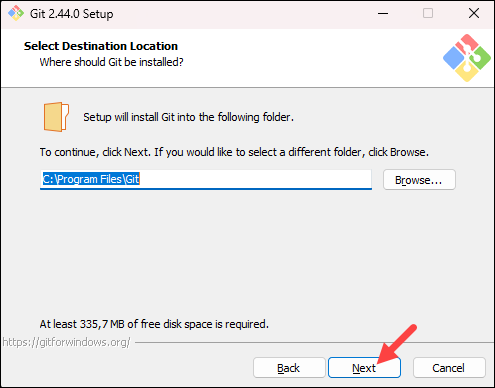
- The installer prompts you for an installation location. Leave the default one unless you want to change it, and click Next.
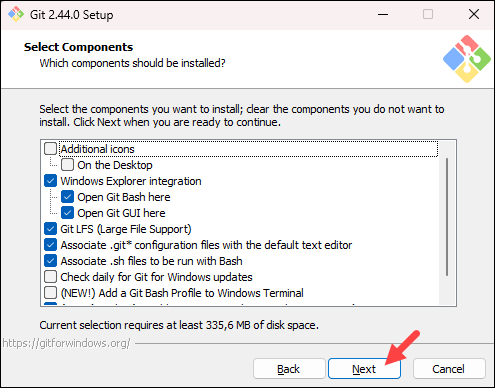
- In the component selection screen, leave the defaults unless you need to change them and click Next.
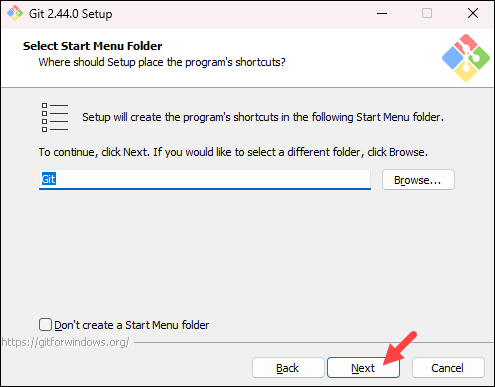
- The installer offers to create a start menu folder. Click Next to accept and proceed to the next step.
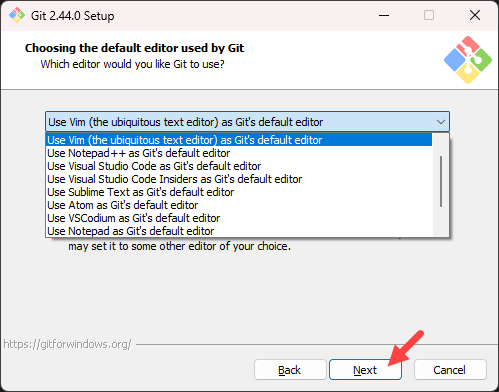
- Select a text editor you want to use with Git. Use the drop-down menu to select Notepad++ (or whichever text editor you prefer) and click Next.
If you prefer to use a CLI text editor in Git Bash, select nano or Vim from the list.
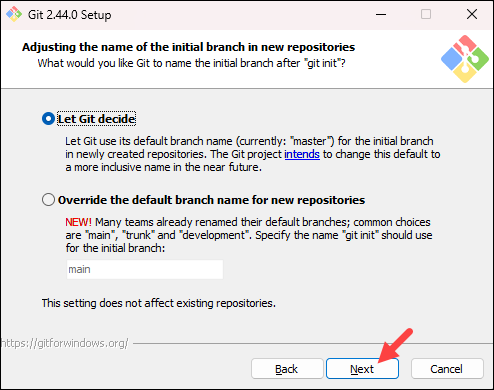
- The next step allows you to choose a different name for your initial branch. The default is
master. Unless you are working in a team that requires a different name, leave the default option and click Next.
Note: If you are new to Git, check out our guides to Git branch name conventions and Git branching strategies.
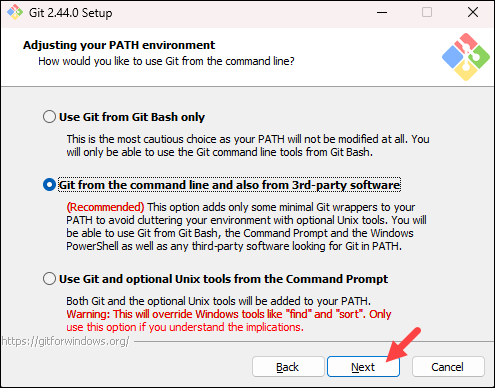
- The next step allows you to change the PATH environment. The PATH is the default set of directories included when you run a command from the command line. Keep the middle (recommended) selection and click Next.
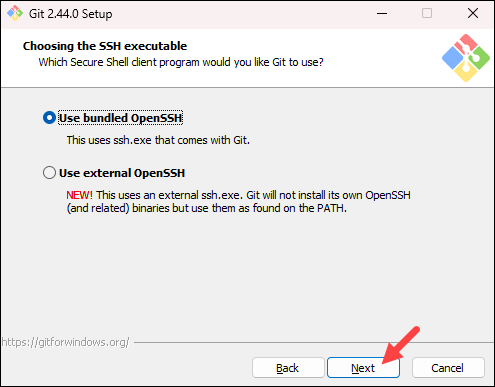
- The installer prompts you to select the SSH client for Git to use. Git already comes with its own SSH client, so if you don’t need a specific one, leave the default option and click Next.
Note: Check out our comparison of SSH and HTTPS for Git and which one you should use.
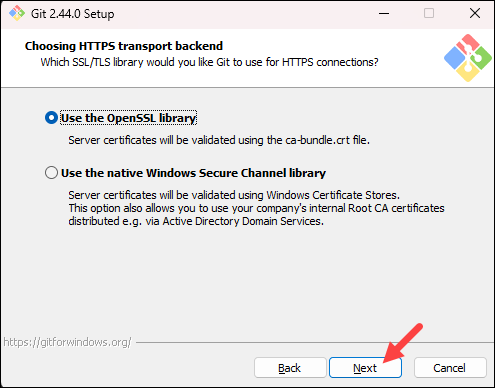
- The next option relates to server certificates. The default option is recommended for most users. If you work in an Active Directory environment, you may need to switch to Windows Store certificates. Select your preferred option and click Next.
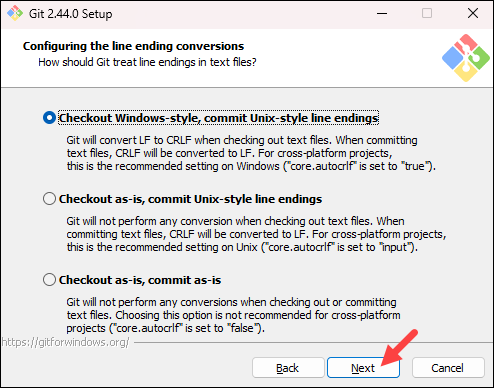
- The following selection configures line-ending conversion, which relates to the way data is formatted. The default selection is recommended for Windows. Click Next to proceed.
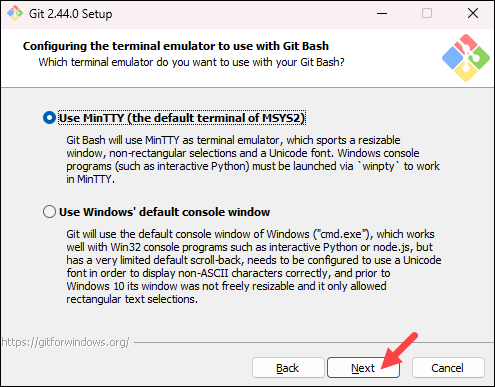
- Choose the terminal emulator you want to use. The default MinTTY is recommended for its features. Click Next to continue.
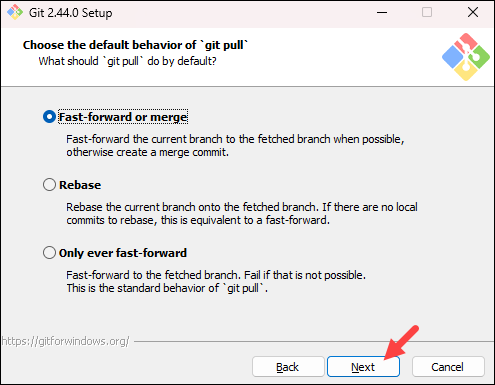
- The next step allows you to choose what the
git pullcommand will do. The default option is recommended unless you specifically need to change its behavior. Click Next to continue with the installation.
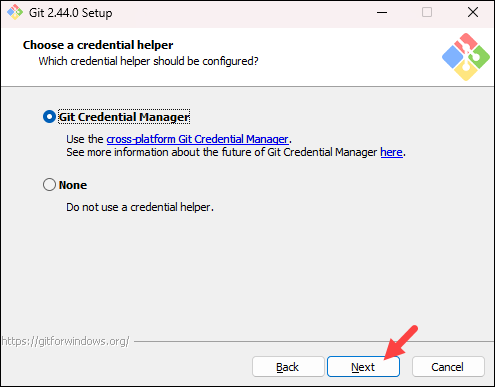
- The next step is to choose which credential helper to use. Git uses credential helpers to fetch or save credentials. The default option is the most stable one. Select your preferred credential manager and click Next.
- The next step lets you decide which extra options to enable. If you use symbolic links, which represent shortcuts for the command line, tick the box. Keep file system caching checked and click Next.

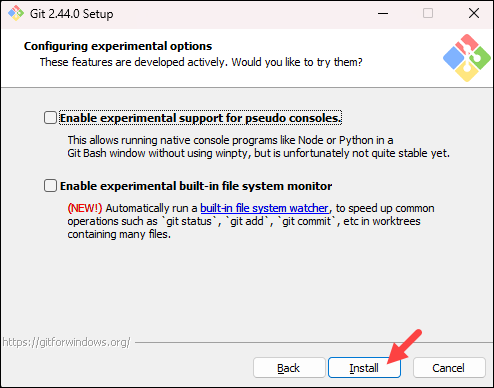
- Depending on which Git version you are installing, it may offer to install experimental features. At the time this article was written, the installer offered options to include support for pseudo controls and a built-in file system monitor. For the most stable operation, do not install experimental features and click Install.
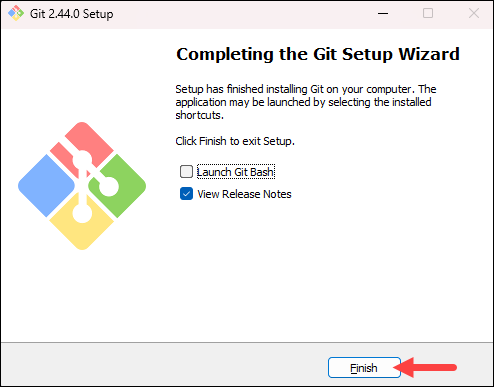
- Once the installation is complete, tick the boxes to view the Release Notes or launch Git Bash if you want to start using Git right away, and click Finish.
Install Git on Windows via CMD
Installing Git on Windows using the command line requires a working Winget installation, an Internet connection for the program to download the necessary files, and access to the Command Prompt or PowerShell.
If you prefer using a package manager for installing and managing programs, follow the steps below:
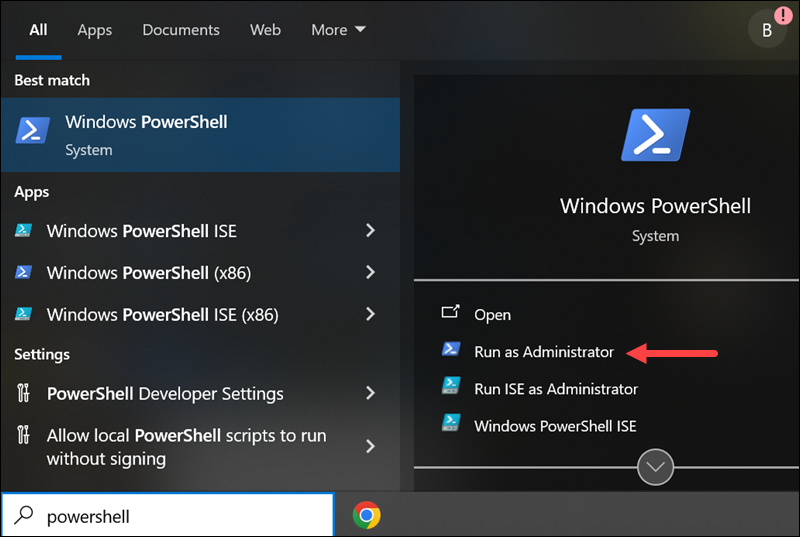
- Press the Windows key and type powershell. From the results, select the Run as administrator option for Windows PowerShell.
- In PowerShell, run the following command to install the latest Git version:
winget install --id Git.Git -e --source winget

The command downloads and installs Git for Windows. It assumes all the default settings and completes the installation automatically.
How to Launch Git in Windows
Git has two modes of use - a bash scripting shell (or command line) and a graphical user interface (GUI). This section shows how to launch Git after installation.
Launch Git Bash Shell
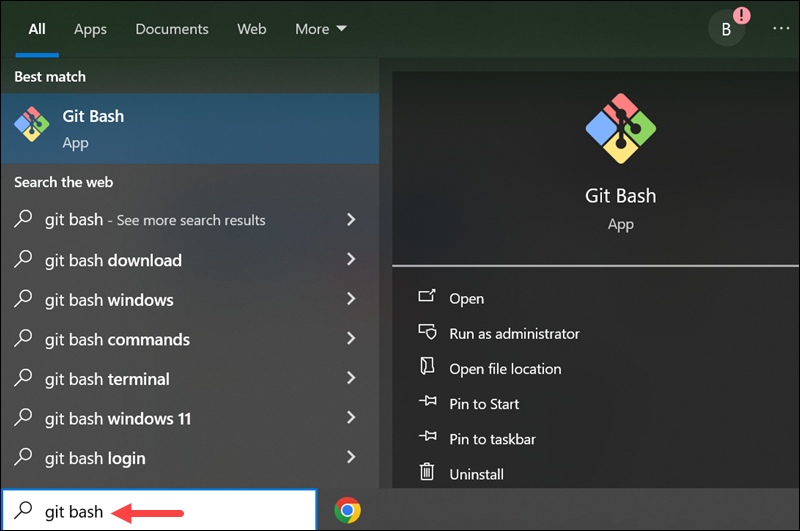
To launch Git Bash, open the Windows Start menu, type git bash, and press Enter (or click the application icon).
Launch Git GUI
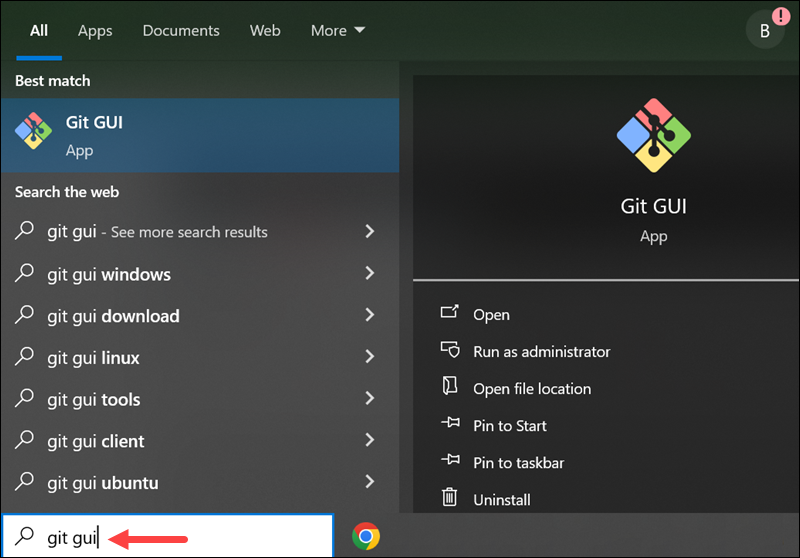
To launch Git GUI, open the Windows Start menu, type git gui, and press Enter (or click the application icon).
How to Check Git Version
To check which Git version is installed on your system, open the PowerShell and run the following command:
git --version

The output shows which Git version is installed on the system.
How to Install Git on MacOs
There are several options for installing Git on macOS. Note that any non-source distributions are provided by third parties, and may not be up to date with the latest source release.
Choose one of the following options for installing Git on macOS:
Homebrew
Install homebrew if you don’t already have it, then:
brew install git
MacPorts
Install MacPorts if you don’t already have it, then:
sudo port install git
Xcode
Apple ships a binary package of Git with Xcode.
Binary installer
Tim Harper provides an installer for Git. The latest version is 2.33.0, which was released almost 3 years ago, on 2021-08-30.
Building from Source
If you prefer to build from source, you can find tarballs on kernel.org. The latest version is 2.45.2.
Installing git-gui
If you would like to install git-gui and gitk, git’s commit GUI and interactive history browser, you can do so using homebrew
brew install git-gui
Comments (0)
No comments yet. Be the first to share your thoughts.
Leave a comment