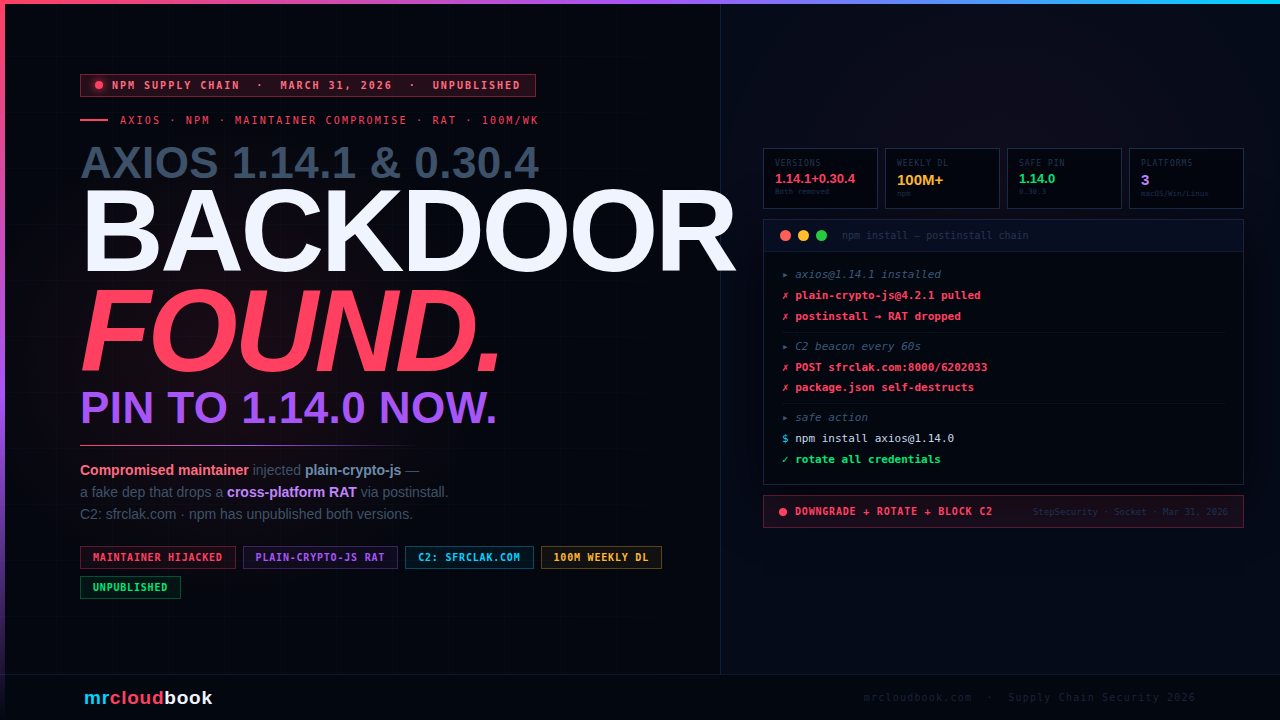
GitHub Actions: Netflix Deployment Powered by DevSecOps

In today’s fast-paced world of software development, automation is the name of the game. GitHub Actions is the ace up the sleeve of modern developers, enabling them to streamline their daily workflows in practical and impactful ways. In this article, we’ll explore how GitHub Actions is making a real difference in real-life scenarios.

From Continuous Integration (CI) and Continuous Deployment (CD) to code quality assurance and security scanning, GitHub Actions brings automation to every aspect of the development process. With custom workflows, enhanced collaboration, and release management, this tool empowers developers to be more efficient, reliable, and productive. Discover how GitHub Actions is not just a concept but a transformative solution in the daily lives of developers.

To launch an AWS EC2 instance with Ubuntu 22.04 using the AWS Management Console, sign in to your AWS account, access the EC2 dashboard, and click “Launch Instances.” In “Step 1,” select “Ubuntu 22.04” as the AMI, and in “Step 2,” choose “t2.medium” as the instance type. Configure the instance details, storage, tags, and security group settings according to your requirements. Review the settings, create or select a key pair for secure access, and launch the instance. Once launched, you can connect to it via SSH using the associated key pair.

Connect to your Ec2 instance using Putty, Mobaxtreme or Git bash and install docker on it.

sudo apt-get update
sudo apt install docker.io -y
sudo usermod -aG docker ubuntu
newgrp docker
sudo chmod 777 /var/run/docker.sock

Pull the SonarQube Docker image and run it.

After the docker installation, we will create a Sonarqube container (Remember to add 9000 ports in the security group).

docker run -d --name sonar -p 9000:9000 sonarqube:lts-community

Now copy the IP address of the ec2 instance

ec2-public-ip:9000

Provide Login and password

login admin
password admin

Update your Sonarqube password & This is the Sonarqube dashboard

Integrating SonarQube with GitHub Actions allows you to automatically analyze your code for quality and security as part of your continuous integration pipeline.

We already have Sonarqube up and running

On Sonarqube Dashboard click on Manually

Next, provide a name for your project and provide a Branch name and click on setup

On the next page click on With GitHub actions

This will Generate an overview of the Project and provide some instructions to integrate

Let’s Open your GitHub and select your Repository

In my case it is Netflix-clone and Click on Settings

Search for Secrets and variables and click on and again click on actions

It will open a page like this click on New Repository secret

Now go back to Your Sonarqube Dashboard

Copy SONAR_TOKEN and click on Generate Token

Click on Generate

Let’s copy the Token and add it to GitHub secrets

Now go back to GitHub and Paste the copied name for the secret and token

Name: SONAR_TOKEN

Secret: Paste Your Token and click on Add secret

Now go back to the Sonarqube Dashboard

Copy the Name and Value

Go to GitHub now and paste-like this and click on add secret

Our Sonarqube secrets are added and you can see

Go to Sonarqube Dashboard and click on continue

Now create your Workflow for your Project. In my case, the Netflix project is built using React Js. That’s why I am selecting Other

Now it Generates and workflow for my Project

Go back to GitHub. click on Add file and then create a new file

Go back to the Sonarqube dashboard and copy the file name and content

Here file name (in my case only )

sonar-project.properties

The content to add to the file is (copied from the above image)

sonar.projectKey=Netflix

Add in GitHub like this

Let’s add our workflow

To do that click on Add file and then click on Create a new file

Here is the file name

.github/workflows/build.yml  #you can use any name iam using sonar.yml

Copy content and add it to the file

name: Build,Analyze,scan
on:
  push:
    branches:
      - main
jobs:
  build-analyze-scan:
    name: Build
    runs-on: ubuntu-latest
    steps:
      - name: Checkout code
        uses: actions/checkout@v2
        with:
          fetch-depth: 0  # Shallow clones should be disabled for a better relevancy of analysis
      - name: Build and analyze with SonarQube
        uses: sonarsource/sonarqube-scan-action@master
        env:
          SONAR_TOKEN: ${{ secrets.SONAR_TOKEN }}
          SONAR_HOST_URL: ${{ secrets.SONAR_HOST_URL }}

Click on commit changes

Now workflow is created.

Click on Actions now

Now it’s automatically started the workflow

Let’s click on Build and see what are the steps involved

Click on Run Sonarsource and you can do this after the build completion

Build complete.

Go to the Sonarqube dashboard and click on projects and you can see the analysis

If you want to see the full report, click on issues.

Add this code to your sonar.yml (I mean workflow)

- name: install trivy
  run: |
    #install trivy
    sudo apt-get install wget apt-transport-https gnupg lsb-release -y
    wget -qO - https://aquasecurity.github.io/trivy-repo/deb/public.key | gpg --dearmor | sudo tee /usr/share/keyrings/trivy.gpg > /dev/null
    echo "deb [signed-by=/usr/share/keyrings/trivy.gpg] https://aquasecurity.github.io/trivy-repo/deb $(lsb_release -sc) main" | sudo tee -a /etc/apt/sources.list.d/trivy.list
    sudo apt-get update
    sudo apt-get install trivy -y
    #command to scan files
    trivy fs .

GitHub Actions workflow step that installs Trivy, a popular open-source vulnerability scanner for containers, and then uses it to scan the files.

I added a step in the workflow

Commit changes

Click on actions again

It started the workflow build

Click on Build, Analyze and scan

It installed Trivy version 0.46.0 and scanned files also. See report

The file scan is completed, this is another security check

Create a Personal Access token for your Dockerhub account

Go to docker hub and click on your profile –> Account settings –> security –> New access token

It asks for a name Provide a name and click on generate token

Copy the token save it in a safe place, and close

Now Go to GitHub again and click on settings

Search for Secrets and variables and click on and again click on actions

It will open a page like this click on New Repository secret

Add your Dockerhub username with the secret name as

DOCKERHUB_USERNAME #use your dockerhub username

Click on Add Secret.

Let’s add our token also and click on the new repository secret again

Name

DOCKERHUB_TOKEN

Paste the token that you generated and click on Add secret.

Next, we will create a TMDB API key

Open a new tab in the Browser and search for TMDB

Click on the first result, you will see this page

Click on the Login on the top right. You will get this page.

You need to create an account here. click on click here. I have an account that’s why I added my details there.

once you create an account you will see this page.

Let’s create an API key, By clicking on your profile and clicking settings.

Now click on API from the left side panel.

Now click on create

Click on Developer

Now you have to accept the terms and conditions.

Provide basic details

Click on submit and you will get your API key.

Let’s add the below step to the workflow

You have to add API at the Build command

Change your username also

- name: Docker build and push
  run: |
    #run commands to build and push docker images
    docker build --build-arg TMDB_V3_API_KEY=<USE YOUR API KEY> -t netflix .
    docker tag netflix sevenajay/netflix:latest
    docker login -u ${{ secrets.DOCKERHUB_USERNAME }} -p ${{ secrets.DOCKERHUB_TOKEN }}
    docker push sevenajay/netflix:latest
  env:
    DOCKER_CLI_ACI: 1

You can see the image, I already added

Let’s commit changes

Click on actions again

It started the workflow build

Click on Build, Analyze and Scan. You will see this Docker image is building now

Build Succeeded

If you go to your Docker hub, you will find that the image is pushed to Dockerhub

Go to GitHub and click on Settings –> Actions –> Runners

Click on New self-hosted runner

Now select Linux and Architecture X64

Use the below commands to add a self-hosted runner

Go to Putty or Mobaxtreme and connect to your ec2 instance

And paste the commands

NOTE: USE YOUR RUNNER COMMANDS (EXAMPLE CASE IAM USING MINE)

mkdir actions-runner && cd actions-runner

The command “mkdir actions-runner && cd actions-runner” is used to create a new directory called “actions-runner” in the current working directory and then immediately change the current working directory to the newly created “actions-runner” directory. This allows you to organize your files and perform subsequent actions within the newly created directory without having to navigate to it separately.

curl -o actions-runner-linux-x64-2.310.2.tar.gz -L https://github.com/actions/runner/releases/download/v2.310.2/actions-runner-linux-x64-2.310.2.tar.gz

This command downloads a file called “actions-runner-linux-x64-2.310.2.tar.gz” from a specific web address on GitHub and saves it in your current directory.

Let’s validate the hash installation

echo "fb28a1c3715e0a6c5051af0e6eeff9c255009e2eec6fb08bc2708277fbb49f93  actions-runner-linux-x64-2.310.2.tar.gz" | shasum -a 256 -c

Now Extract the installer

tar xzf ./actions-runner-linux-x64-2.310.2.tar.gz

Let’s configure the runner

./config.sh --url https://github.com/Aj7Ay/Netflix-clone --token A2MXW4323ALGB72GGLH34NLFGI2T4

Let’s start runner

./run.sh

Let’s add a deployment workflow

deploy:
    needs: build-analyze-scan
    runs-on: [aws-netflix]
    steps:
      - name: Pull the docker image
        run: docker pull sevenajay/netflix:latest
      - name: Trivy image scan
        run: trivy image sevenajay/netflix:latest
      - name: Run the container netflix
        run: docker run -d --name netflix -p 8081:80 sevenajay/netflix:latest
  1. deploy:: This is the name of a workflow or job, likely associated with a CI/CD pipeline. It specifies what should happen when this deployment job is triggered.
  2. needs: build-analyze-scan: This line indicates that this deployment job depends on the successful completion of a previous job named “build-analyze-scan.” In other words, it waits for “build-analyze-scan” to finish before starting.
  3. runs-on: [aws-netflix]: This job is set to run on a specific type of runner or environment, labeled as “aws-netflix.” Runners are the environments where jobs are executed, and “aws-netflix” suggests that this deployment might be intended for an AWS-based infrastructure.
  4. steps:: This section lists the individual steps or tasks to be executed as part of the deployment job.
    • name: Pull the docker image: This step has a descriptive name. It uses the docker pull command to fetch a Docker image labeled “sevenajay/netflix:latest.” This is a common step in container-based deployments, where it ensures that the latest version of the Docker image is available locally.
    • name: Trivy image scan: This step performs a security scan on the Docker image “sevenajay/netflix:latest” using a tool called Trivy. Trivy is used for vulnerability scanning of container images.
    • name: Run the container netflix: This step starts a Docker container named “netflix” using the image “sevenajay/netflix:latest.” It runs the container in detached mode (“-d”) and maps port 8081 on the host to port 80 in the container, making the service accessible via port 8081 on the host.

This workflow is designed to automate the deployment of a Docker container, with checks for the latest image, a security scan, and launching the container. The success of this job depends on the success of the preceding “build-analyze-scan” job, and it’s meant to be executed on the specified runner, possibly in an AWS environment.

Commit changes

Click on actions again

You will see two different Jobs now

Click on Build and Push docker image Build (using the above image), you will see this once the first job completes

Now come back by clicking on Summary and click on Deploy now

You can see how it’s pulling image and scanning image

It starts running the job on your Ec2 instance

Now it’s completed running the container

You will see this in the instance

On GitHub, you will see this. the build succeeded

Now copy your ec2 instance ip and go to the browser

Ec2-instance-ip:8081

You will see Netflix app will run

Deployment is done.

FULL WORKFLOW

name: Build,Analyze,scan
on:
  push:
    branches:
      - main
jobs:
  build-analyze-scan:
    name: Build
    runs-on: ubuntu-latest
    steps:
      - name: Checkout code
        uses: actions/checkout@v2
        with:
          fetch-depth: 0  # Shallow clones should be disabled for a better relevancy of analysis
      - name: Build and analyze with SonarQube
        uses: sonarsource/sonarqube-scan-action@master
        env:
          SONAR_TOKEN: ${{ secrets.SONAR_TOKEN }}
          SONAR_HOST_URL: ${{ secrets.SONAR_HOST_URL }}
      - name: install trivy
        run: |
           #install trivy
           sudo apt-get install wget apt-transport-https gnupg lsb-release -y
           wget -qO - https://aquasecurity.github.io/trivy-repo/deb/public.key | gpg --dearmor | sudo tee /usr/share/keyrings/trivy.gpg > /dev/null
           echo "deb [signed-by=/usr/share/keyrings/trivy.gpg] https://aquasecurity.github.io/trivy-repo/deb $(lsb_release -sc) main" | sudo tee -a /etc/apt/sources.list.d/trivy.list
           sudo apt-get update
           sudo apt-get install trivy -y
           #scanning files
           trivy fs .
      - name: Docker build and push
        run: |
          #run commands to build and push docker images
          docker build --build-arg TMDB_V3_API_KEY=Aj7ay86fe14eca3e76869b92 -t netflix .
          docker tag netflix sevenajay/netflix:latest
          docker login -u ${{ secrets.DOCKERHUB_USERNAME }} -p ${{ secrets.DOCKERHUB_TOKEN }}
          docker push sevenajay/netflix:latest
        env:
          DOCKER_CLI_ACI: 1
  deploy:
    needs: build-analyze-scan
    runs-on: [aws-netflix]
    steps:
      - name: Pull the docker image
        run: docker pull sevenajay/netflix:latest
      - name: Trivy image scan
        run: trivy image sevenajay/netflix:latest
      - name: Run the container netflix
        run: docker run -d --name netflix -p 8081:80 sevenajay/netflix:latest

Clear the instance.

I hope you found this blog insightful and that you’ve learned something new about how GitHub Actions can supercharge your Netflix deployments through the lens of DevSecOps. As technology evolves, staying informed and adaptable is key to thriving in the world of software development. If you have any questions or would like to share your thoughts, feel free to reach out. Your feedback and engagement are invaluable as we continue to explore and embrace the exciting innovations in the tech landscape. Thank you for joining me on this journey of discovery!

mrcloudbook.com avatar

Ajay Kumar Yegireddi is a DevSecOps Engineer and System Administrator, with a passion for sharing real-world DevSecOps projects and tasks. Mr. Cloud Book, provides hands-on tutorials and practical insights to help others master DevSecOps tools and workflows. Content is designed to bridge the gap between development, security, and operations, making complex concepts easy to understand for both beginners and professionals.

Comments

One response to “GitHub Actions: Netflix Deployment Powered by DevSecOps”

  1. Artem avatar

    Hello,
    This is really cool project. I’ve learned some new features here. Keep up the good work.

    Full workflow has one little issue in deploy job. The step named “Trivy image scan” is not running correctly. I think that is because of trivy missing on our ec2 (self-hosted runner).

    Thanks for your time.
    Regards,
    Artem

Leave a Reply

Your email address will not be published. Required fields are marked *