This guide will walk you through the process of setting up the necessary AWS infrastructure for your Terraform deployment, including an Ubuntu server, IAM user with appropriate permissions, and an S3 bucket for storing Terraform state files. and finally setup EKS cluster with terraform files.
Prerequisites
- An AWS account
- AWS CLI installed on your local machine
- Basic understanding of AWS services
Part 1: Creating an Ubuntu Server
- Log in to the AWS Management Console
- Navigate to EC2 Dashboard
- Click “Launch Instance”
- Configure the instance:
- Name your instance (e.g., “terraform-ubuntu-server”)
- Select “Ubuntu Server 24.04 LTS (HVM)” as the AMI
- Choose an appropriate instance type (t2.micro for testing)
- Create or select a key pair for SSH access
- Configure the VPC and subnet settings
- Create a security group with the following rules:
- SSH (Port 22) from your IP
- HTTP (Port 80) if needed
- HTTPS (Port 443) if needed
- Review and launch the instance
- Wait for the instance to initialize (Status Checks: 2/2 passed)
Part 2: Creating an IAM User with Required Permissions
- Navigate to IAM Dashboard
- Click “Users” → “Add user”
- Configure the user:
Username: terraform-admin
Access type: Programmatic access
4. Set permissions by attaching the following policies:
- AdministratorAccess (if full admin access is required)
- AmazonEKSClusterPolicy
- AmazonEKSServicePolicy
- AmazonEC2FullAccess
- AmazonS3FullAccess
5.Review and create the user
Once user is created select user and click on Security credentials –> Create Access keys
6. IMPORTANT: Download the credentials file containing:
- Access key ID
- Secret access key
Part 3: Creating an S3 Bucket for Terraform State
- Navigate to S3 Dashboard
- Click “Create bucket”
- Configure the bucket:
Bucket name: your-terraform-state-bucket (must be globally unique)
Region: Choose your preferred region
Block all public access: Enabled (recommended)
Bucket versioning: Enabled (recommended)
Server-side encryption: Enabled (recommended)
4. Create bucket
Do AWS configure on the Ubuntu server
Install aws cli
sudo apt update && sudo apt install unzip -y
sudo snap install terraform --classic
curl "https://awscli.amazonaws.com/awscli-exe-linux-x86_64.zip" -o "awscliv2.zip"
unzip awscliv2.zip
sudo ./aws/install
Part 4: Setup EKS Cluster
- Download the GitHub repo for the terraform file
https://github.com/Aj7Ay/two-tier-flask-app.gitTerraform files in the Eks-terraform Directory
Here main.tf
data "aws_iam_policy_document" "assume_role" {
  statement {
    effect = "Allow"

    principals {
      type        = "Service"
      identifiers = ["eks.amazonaws.com"]
    }

    actions = ["sts:AssumeRole"]
  }
}

resource "aws_iam_role" "example" {
  name               = "eks-cluster-cloud"
  assume_role_policy = data.aws_iam_policy_document.assume_role.json
}

resource "aws_iam_role_policy_attachment" "example-AmazonEKSClusterPolicy" {
  policy_arn = "arn:aws:iam::aws:policy/AmazonEKSClusterPolicy"
  role       = aws_iam_role.example.name
}

#get vpc data
data "aws_vpc" "default" {
  default = true
}
#get public subnets for cluster
data "aws_subnets" "public" {
  filter {
    name   = "vpc-id"
    values = [data.aws_vpc.default.id]
  }
}
#cluster provision
resource "aws_eks_cluster" "example" {
  name     = "EKS_CLOUD"
  role_arn = aws_iam_role.example.arn

  vpc_config {
    subnet_ids = data.aws_subnets.public.ids
  }

  # Ensure that IAM Role permissions are created before and deleted after EKS Cluster handling.
  # Otherwise, EKS will not be able to properly delete EKS managed EC2 infrastructure such as Security Groups.
  depends_on = [
    aws_iam_role_policy_attachment.example-AmazonEKSClusterPolicy,
  ]
}

resource "aws_iam_role" "example1" {
  name = "eks-node-group-cloud"

  assume_role_policy = jsonencode({
    Statement = [{
      Action = "sts:AssumeRole"
      Effect = "Allow"
      Principal = {
        Service = "ec2.amazonaws.com"
      }
    }]
    Version = "2012-10-17"
  })
}

resource "aws_iam_role_policy_attachment" "example-AmazonEKSWorkerNodePolicy" {
  policy_arn = "arn:aws:iam::aws:policy/AmazonEKSWorkerNodePolicy"
  role       = aws_iam_role.example1.name
}

resource "aws_iam_role_policy_attachment" "example-AmazonEKS_CNI_Policy" {
  policy_arn = "arn:aws:iam::aws:policy/AmazonEKS_CNI_Policy"
  role       = aws_iam_role.example1.name
}

resource "aws_iam_role_policy_attachment" "example-AmazonEC2ContainerRegistryReadOnly" {
  policy_arn = "arn:aws:iam::aws:policy/AmazonEC2ContainerRegistryReadOnly"
  role       = aws_iam_role.example1.name
}

#create node group
resource "aws_eks_node_group" "example" {
  cluster_name    = aws_eks_cluster.example.name
  node_group_name = "Node-cloud"
  node_role_arn   = aws_iam_role.example1.arn
  subnet_ids      = data.aws_subnets.public.ids

  scaling_config {
    desired_size = 1
    max_size     = 2
    min_size     = 1
  }
  instance_types = ["t2.medium"]

  # Ensure that IAM Role permissions are created before and deleted after EKS Node Group handling.
  # Otherwise, EKS will not be able to properly delete EC2 Instances and Elastic Network Interfaces.
  depends_on = [
    aws_iam_role_policy_attachment.example-AmazonEKSWorkerNodePolicy,
    aws_iam_role_policy_attachment.example-AmazonEKS_CNI_Policy,
    aws_iam_role_policy_attachment.example-AmazonEC2ContainerRegistryReadOnly,
  ]
}
Here is backend.tf file
terraform {
  backend "s3" {
    bucket = "<add bucket>" # Replace with your actual S3 bucket name
    key    = "EKS/terraform.tfstate"
    region = "ap-south-1"
  }
}
Here is Provider.tf
terraform {
  required_providers {
    aws = {
      source  = "hashicorp/aws"
      version = "~> 5.0"
    }
  }
}

# Configure the AWS Provider
provider "aws" {
  region = "ap-south-1"
}
In Eks terraform folder
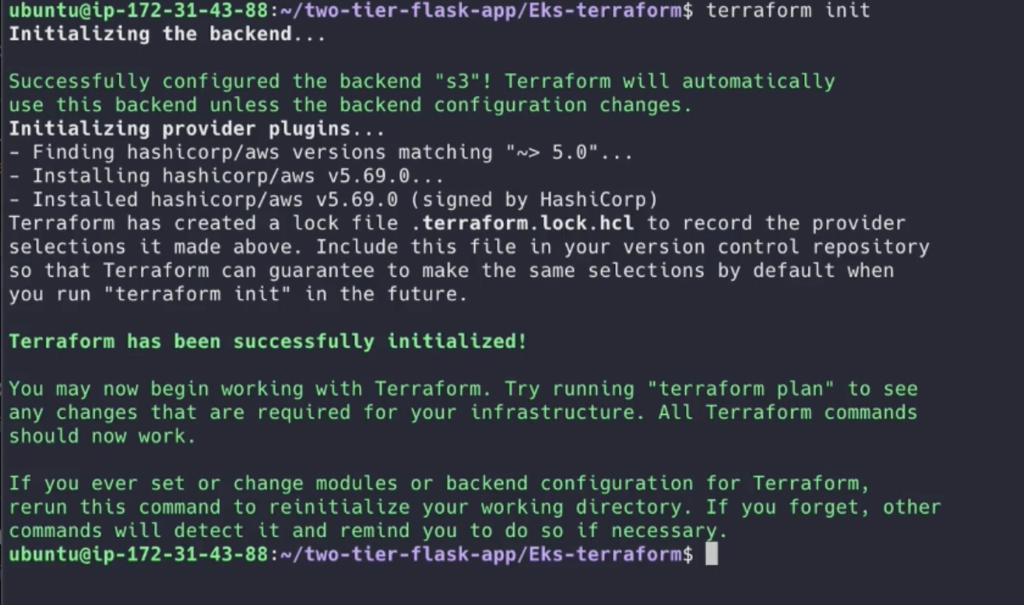
First do the terraform init
terraform init
Once terraform initialized do
terraform plan

After plane do the apply
terraform apply --auto-approve

This will take 15 mins to create the EKS cluster
Relax and watch my video on Youtube ( Mr Cloud Book )
Once done
aws eks update-kubeconfig --name EKS_CLOUD --region ap-south-1
Check available nodes
kubectl get nodesOnce done , remove the cluster
terraform destory --auto-approveThanks for reading the blog .

Leave a Reply