Introduction
Kubernetes is a powerful open-source platform designed to automate the deployment, scaling, and operation of application containers. In this comprehensive guide, we’ll explore how to set up a Kubernetes cluster using three nodes, leveraging the flexibility and scalability of Amazon EC2 instances. We’ll ensure each step is clear and detailed, making it easy for anyone to follow along, even a fifth-grader!
What You Will Need
Before we start, let’s go over the requirements and setup for creating our Kubernetes cluster.
- Two EC2 Instances: We will use one instance as the master node and one instances as worker node.
- Instance Type: Each instance should have at least 2GB of RAM. We recommend using the t2.medium instance type for its balance of performance and cost.
Caution: The t2.medium instance costs. Make sure to monitor your usage to avoid unexpected costs.
Step 1: Create Amazon EC2 Instances
To begin, we need to create our EC2 instances. Follow these steps to configure your instances:
Configuration for All Instances:
- Select the OS Version: Choose Ubuntu 24.04 for its stability and latest features.
- Select an Instance Type: Ensure each instance has at least 2GB of RAM and 2 CPUs. The t2.medium instance type is a suitable choice.
Detailed Steps to Launch EC2 Instances:
- Open the AWS Management Console: Navigate to the EC2 Dashboard.
- Launch Instance: Click on the “Launch Instance” button.
- Choose an Amazon Machine Image (AMI): Select “Ubuntu Server 24.04 LTS (HVM), SSD Volume Type”.
- Choose an Instance Type: Select “t2.medium”.
- Configure Instance Details:
- Number of instances: 2
- Network: Default VPC
- Subnet: Choose an available subnet
- Auto-assign Public IP: Enable
- Add Storage: Use the default 16GB for the root volume.
- Add Tags: (Optional) Add tags to identify your instances.
- Configure Security Group:
- Create a new security group or use an existing one. ( Open all Ports for Learning Purpose Only )
- Add rules to allow SSH access (port 22) from your IP address.
- Review and Launch: Review your settings and click “Launch”. Select an existing key pair or create a new one for SSH access, then click “Launch Instances”.
After launching, you will have three instances ready to be configured as your Kubernetes cluster.
Step 2: Install and Configure Docker and Kubernetes
Connect to the Instances
You need to connect to each instance via SSH. Use the following command in your terminal (replace <instance-ip> with the actual public IP address of your instance):
ssh -i <your-key-pair.pem> ubuntu@<instance-ip>Install Docker and Kubernetes Components
Run the following commands on two instances (master and worker nodes):
Update and Upgrade Packages:
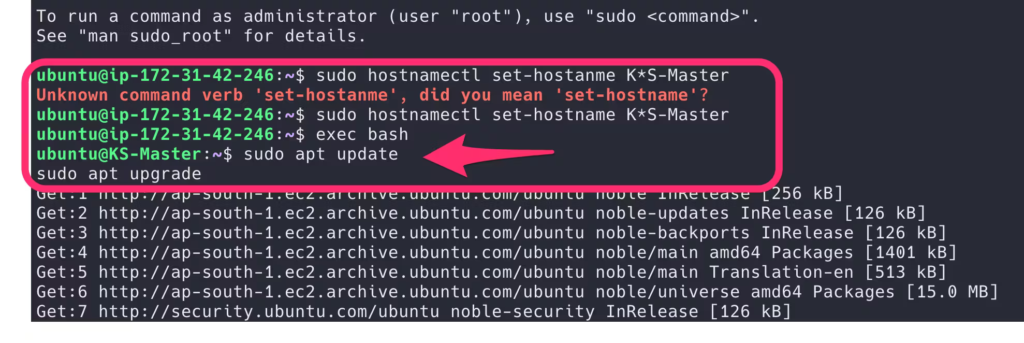
sudo apt update
sudo apt upgrade -y
Disable Swap:
sudo swapoff -a
sudo sed -i '/ swap / s/^\(.*\)$/#\1/g' /etc/fstab
Load Kernel Modules:
sudo tee /etc/modules-load.d/containerd.conf <<EOF
overlay
br_netfilter
EOF
sudo modprobe overlay
sudo modprobe br_netfilter
Set Up Required sysctl Parameters:
sudo tee /etc/sysctl.d/kubernetes.conf <<EOF
net.bridge.bridge-nf-call-ip6tables = 1
net.bridge.bridge-nf-call-iptables = 1
net.ipv4.ip_forward = 1
EOF
sudo sysctl --system
Install Docker
sudo apt install -y curl gnupg2 software-properties-common apt-transport-https ca-certificates
sudo curl -fsSL https://download.docker.com/linux/ubuntu/gpg | sudo gpg --dearmour -o /etc/apt/trusted.gpg.d/docker.gpg
sudo add-apt-repository "deb [arch=amd64] https://download.docker.com/linux/ubuntu $(lsb_release -cs) stable"
sudo apt update
sudo apt install -y containerd.io

Configure Containerd:
containerd config default | sudo tee /etc/containerd/config.toml >/dev/null 2>&1
sudo sed -i 's/SystemdCgroup \= false/SystemdCgroup \= true/g' /etc/containerd/config.toml
sudo systemctl restart containerd
sudo systemctl enable containerd
Install Kubernetes Packages
Add Kubernetes Repository:
curl -fsSL https://pkgs.k8s.io/core:/stable:/v1.28/deb/Release.key | sudo gpg --dearmor -o /etc/apt/keyrings/kubernetes-apt-keyring.gpg
echo 'deb [signed-by=/etc/apt/keyrings/kubernetes-apt-keyring.gpg] https://pkgs.k8s.io/core:/stable:/v1.28/deb/ /' | sudo tee /etc/apt/sources.list.d/kubernetes.list
sudo apt update
sudo apt install -y kubeadm=1.28.1-1.1 kubelet=1.28.1-1.1 kubectl=1.28.1-1.1
if the above command doesn’t work, use the Snap method:
sudo snap install kubeadm=1.28.1-1.1 --classic
sudo snap install kubectl=1.28.1-1.1 --classic
sudo snap install kubelet=1.28.1-1.1 --classic
Step 3: Initialize Kubernetes Cluster on the Master Node
Initialize the Cluster
On the master node, run the following command to initialize the Kubernetes cluster:
sudo kubeadm init
Post-Initialization Setup on the Master Node
After initialization, set up the kubeconfig for the user on the master node:
mkdir -p $HOME/.kube
sudo cp -i /etc/kubernetes/admin.conf $HOME/.kube/config
sudo chown $(id -u):$(id -g) $HOME/.kube/config
Additional Configuration: Deploy a Pod Network
To enable communication between pods, you need to deploy a pod network. Here’s how to deploy Calico, a popular networking solution for Kubernetes:
kubectl apply -f https://docs.projectcalico.org/manifests/calico.yaml
Step 4: Add Worker Nodes to the Cluster
Join Worker Nodes to the Cluster
Use the kubeadm join command provided during the master node initialization on each worker node. This command will look something like this (replace the placeholders with your actual values):
sudo kubeadm join <master-node-ip>:6443 --token <token> --discovery-token-ca-cert-hash sha256:<hash>
# Dont forget to use SUDO
Verify the Cluster
To verify that the worker nodes have joined the cluster, run the following command on the master node:
kubectl get nodes
Conclusion
Congratulations! You have successfully set up a Kubernetes cluster on Ubuntu 24.04 using AWS EC2 instances. You can now start deploying your applications and exploring the powerful features of Kubernetes.
Summary of Key Points
- Created EC2 Instances: Launched two instances for the master and worker nodes.
- Installed and Configured Docker: Set up Docker and containerd on all nodes.
- Installed Kubernetes Components: Installed kubeadm, kubelet, and kubectl on all nodes.
- Initialized the Cluster: Initialized Kubernetes on the master node and joined worker nodes to the cluster.
- Deployed a Pod Network: Set up Calico for pod communication.
Additional Tips
- Monitoring and Logging: Set up monitoring and logging for better cluster management.
- Security: Regularly update and patch your nodes to ensure security.
With these steps, setting up a Kubernetes cluster is straightforward and manageable, even for someone new to the process. Happy clustering!

Leave a Reply