Are you looking to run Kubernetes locally for development and testing? Minikube is the perfect solution, allowing you to spin up a single-node Kubernetes cluster on your Ubuntu machine. In this guide, we’ll walk through the complete installation process of Minikube on Ubuntu 24.04.
Prerequisites
Before we begin, ensure your system meets the following requirements:
- Ubuntu 24.04 LTS
- At least 20GB of free storage
- Minimum 4GB RAM
- 2 CPU cores
- Internet connection
Step 1: Installing Docker
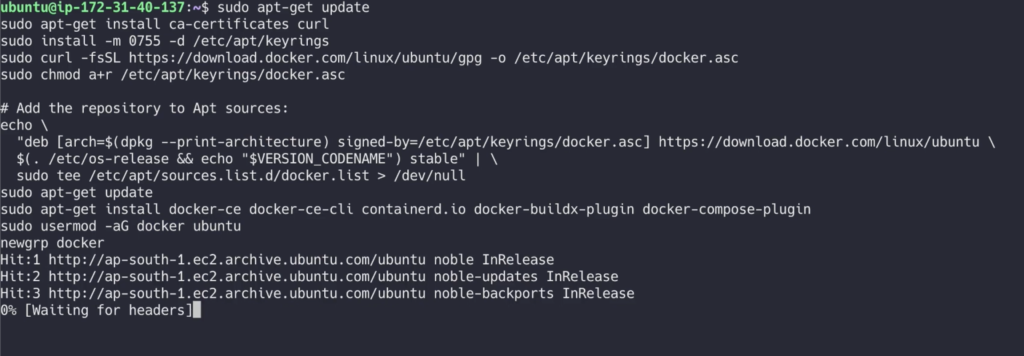
First, we need to install Docker as it’s the required container runtime for Minikube. Here’s how to install Docker on Ubuntu 24.04:
- Update the package index and install required packages:
sudo apt-get update
sudo apt-get install ca-certificates curl
2. Set up Docker’s official GPG key:
sudo install -m 0755 -d /etc/apt/keyrings
sudo curl -fsSL https://download.docker.com/linux/ubuntu/gpg -o /etc/apt/keyrings/docker.asc
sudo chmod a+r /etc/apt/keyrings/docker.asc
3. Add Docker repository to Apt sources:
echo \
"deb [arch=$(dpkg --print-architecture) signed-by=/etc/apt/keyrings/docker.asc] https://download.docker.com/linux/ubuntu \
$(. /etc/os-release && echo "$VERSION_CODENAME") stable" | \
sudo tee /etc/apt/sources.list.d/docker.list > /dev/null
4. Install Docker packages:
sudo apt-get update
sudo apt-get install docker-ce docker-ce-cli containerd.io docker-buildx-plugin docker-compose-plugin
5. Add your user to the Docker group:
sudo usermod -aG docker ubuntu
newgrp docker
Step 2: Installing Minikube
Now that Docker is installed, let’s proceed with installing Minikube:
curl -LO https://storage.googleapis.com/minikube/releases/latest/minikube-linux-amd64
sudo install minikube-linux-amd64 /usr/local/bin/minikube
rm minikube-linux-amd64
Verify the installation:
minikube versionStep 3: Installing kubectl
kubectl is the command-line tool for interacting with Kubernetes clusters. Here’s how to install it:
- Download and install kubectl:
curl -LO "https://dl.k8s.io/release/$(curl -L -s https://dl.k8s.io/release/stable.txt)/bin/linux/amd64/kubectl"
sudo install -o root -g root -m 0755 kubectl /usr/local/bin/kubectl
rm kubectl
Or use snap command link
sudo snap install kubectl --classicVerify the installation:
kubectl version --client
Step 4: Starting Minikube
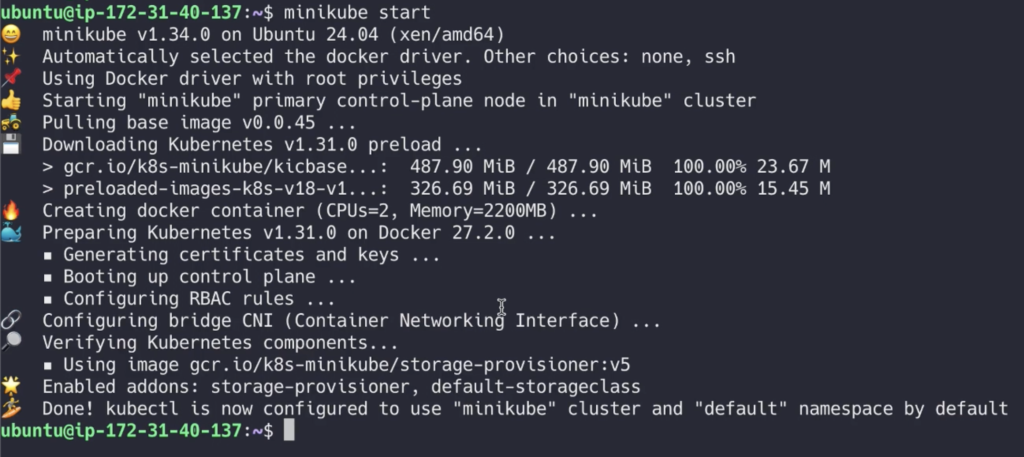
Now that we have all the components installed, let’s start Minikube:
- Start the Minikube cluster:
minikube startVerify the cluster status:
minikube status
You should see output indicating that the cluster is running, and the kubectl context is properly configured.
Troubleshooting Tips
- If you encounter memory or CPU-related errors, ensure your system meets the minimum requirements and no other resource-intensive applications are running.
- If Docker fails to start, try running
sudo systemctl start docker - For permission issues, ensure your user is properly added to the Docker group and you’ve logged out and back in.
Conclusion
Congratulations! You now have a working Minikube installation on your Ubuntu 24.04 system. This local Kubernetes environment is perfect for development, testing, and learning Kubernetes concepts without needing a full-scale cluster.
To start using your Minikube cluster, you can try some basic commands:
# Get cluster information
kubectl cluster-info

# View all nodes
kubectl get nodes

# Get all pods in all namespaces
kubectl get pods --all-namespaces
Remember to stop your Minikube cluster when you’re done to free up system resources:
minikube stopHappy Kubernetes development!

Leave a Reply